
Fixing floors first solves most of the problem: adding mass and decoupling under your lifting zone, quieting your equipment, and sealing gaps around doors and vents will eliminate the majority of noise complaints from neighbors or family. Most homeowners see the biggest jump in quiet after the first weekend of work, before any wall treatment or renovation. Everything past that point is refinement.
TL;DR:
- Adding mass and decoupling under your lifting zone can significantly reduce impact noise before any wall or ceiling treatment is necessary.
- A thick rubber or stall mat on a concrete slab or layered with plywood on joisted floors provides the most effective impact noise mitigation.
- Small hardware fixes like felt strips, rubber tape, and dampening cubes can eliminate rattles and vibrations without major costs or permanent modifications.
- Sealing gaps around doors, outlets, and vents is crucial, as these small leaks let most airborne sound pass through walls and floors.
- Acoustic panels mainly absorb echo inside the room and do little to block impact noise, which is the primary concern for downstairs or neighbor complaints.
Table of Contents
- What Should You Fix First in a Soundproof Home Gym?
- How Do You Build an Effective Soundproof Gym Floor?
- Quiet Your Gear: Plates, Racks, and Better Habits
- What Do Acoustic Panels Actually Fix?
- Seal the Envelope Before You Spend on Anything Else
- Reduce Continuous Noise from Treadmills and Cardio Machines
- Can Renters Soundproof a Home Gym Without Drilling?
- What Should You Budget for a Soundproof Home Gym?
- Why Trust This Soundproofing Guidance?
- Your Soundproofing Plan for the Next 30, 90, and 180 Days
- An Editor’s Take: Soundproof Your Home Gym With Floor-First Fixes That Work
- Sources
- FAQ
What Should You Fix First in a Soundproof Home Gym?
Start with the floor. Structure-borne noise, the thud of a dropped barbell or a landed jump, travels through your subfloor and framing far more efficiently than airborne sound travels through the air, which is why a padded wall does almost nothing for a dropped kettlebell but a mat under it does everything. Here’s the order that actually works, based on where the noise originates and how far it travels.
- Lay a heavy rubber mat or horse-stall mat under your lift zone. A single 4x6 stall mat typically covers most of a squat rack footprint on its own and is a cost-effective option, according to Home Gym Foundry’s soundproofing guide.
- Add rubber feet and dampening cubes under any equipment with metal legs. These stop the buzz and rattle that happens even without a drop.
- Switch to controlled eccentrics instead of drops. Lower the bar instead of releasing it. This single habit change removes a huge share of impact noise for free.
- Install a door sweep and outlet gaskets. These close the small air gaps that let sound leak straight through a wall that otherwise looks solid.
- Hang moving blankets on the wall shared with a bedroom or neighbor if airborne echo is still a problem after the floor and door are handled.
- Address cardio separately. Put your treadmill on a dense isolation mat, or swap it for a walking pad or rower if the room shares a floor with someone below.
Pro Tip: Buy a $15 to $20 decibel meter before you start. Take a baseline reading during a normal workout, then measure again after the floor goes in. Seeing the drop in numbers, not just feeling it, keeps you from over-investing in the next tier before you need to.
How Do You Build an Effective Soundproof Gym Floor?
Impact noise moves through your house as vibration, not sound waves in the air. When a plate hits the floor, that energy transfers directly into the subfloor, into the joists, and into the ceiling of the room below, or through the slab into a neighbor’s shared wall. Carpet padding and thin gym mats barely interrupt that transfer. What works is a combination of mass, which absorbs and slows the energy, and decoupling, which breaks the direct physical path so vibration can’t travel efficiently from one layer to the next.
That’s why a proper floor system outperforms every other single fix in a home gym.
The right build depends on what’s underneath you.
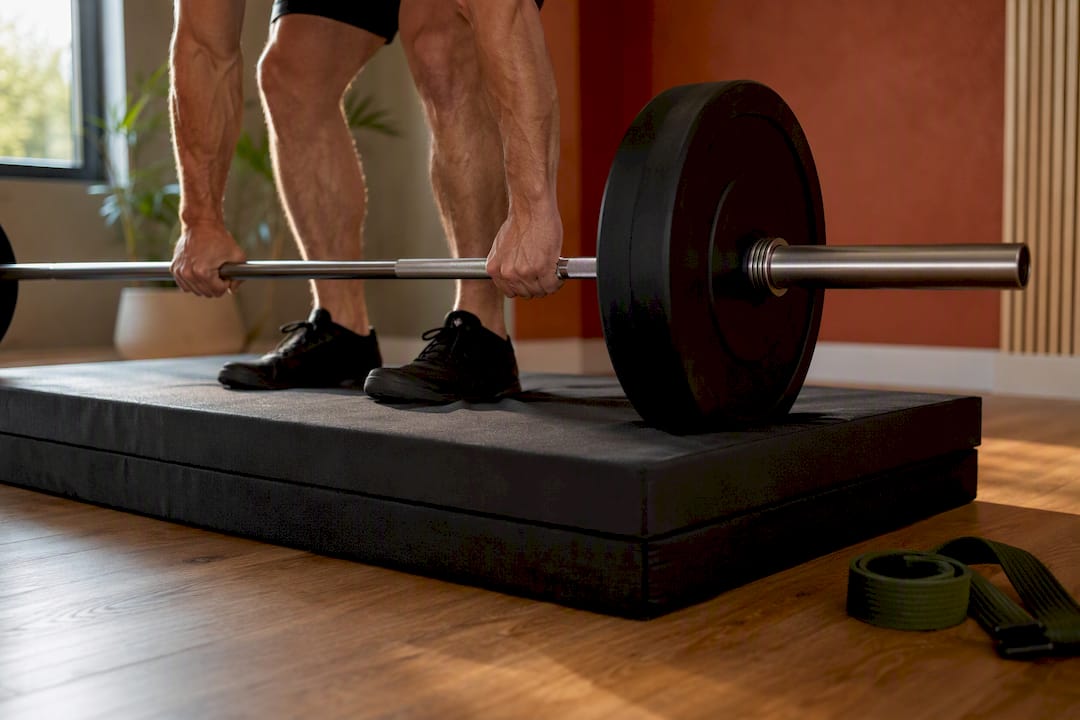
- Concrete slab (basement or garage): A single dense rubber stall mat, at least 3/4 inch thick, laid directly over the slab handles most impact noise on its own. No plywood needed since concrete already provides plenty of mass.
- Joisted floor (upstairs room, second story): Layer 3/4-inch CDX plywood as a rigid base, then top it with a stall mat or interlocking rubber tiles at least 1/2 inch thick and rated for at least 1 pound per square foot of density. The plywood spreads point-load impact across a wider area of joist before it ever reaches the mat.
- Raised lifting platform: For dedicated Olympic lifting, build a layered platform of plywood and rubber with a strip of isolation material, closed-cell foam or rubber, around the entire perimeter where the platform meets the surrounding floor. That perimeter gap is what stops the platform from acting like a drum connected to the rest of the room. Purpose-built platforms with proper perimeter isolation reduce peak transmitted impact far more effectively than any wall treatment, according to acoustic engineering guidance from Fitness Design Group.
A few installation details matter more than people expect. Loose-lay your mats rather than gluing them down; adhesive creates a rigid bond that can actually transmit more vibration than a mat sitting freely on top of plywood. Distribute weight racks and rigs across multiple tiles rather than centering everything on one seam. And if you’re building a raised platform, keep the height modest, generally no more than 4 to 6 inches, since a taller platform without solid bracing becomes both a tripping hazard and a bigger vibrating surface.
A focused floor stack, plywood plus a stall mat plus loose-lay matting around the edges, typically covers the majority of what most home gyms need and is an affordable choice, per Home Gym Foundry’s pricing breakdown. If you’re shopping for flooring options built for exactly this kind of layered install, Couchanddumbells has a roundup of professional gym flooring picks worth comparing against a DIY stack, and a guide to choosing durable flooring that covers installation and longevity in more depth.
Quiet Your Gear: Plates, Racks, and Better Habits
Once the floor is handled, the next cheapest wins come from the equipment itself and how you use it. Bumper plates are noticeably quieter than iron plates on impact because the rubber coating absorbs energy on contact instead of transmitting a sharp metal-on-metal or metal-on-floor crack. Rubber-coated iron plates land in the middle: quieter than bare iron, louder than true bumpers, but usually good enough once they’re sitting on a proper mat.
Most of the remaining noise doesn’t come from lifting at all. It comes from loose hardware.
- Felt strips on J-cups stop the metallic clank every time you rack or unrack a bar.
- Rubber or foam tape on any metal-to-metal contact point (safety pins, spotter arms, storage hooks) kills rattle almost instantly.
- Dampening cubes under adjustable benches and machine bases absorb vibration before it reaches the floor.
- Rubber feet under storage trees and plate racks stop the tipping-and-settling clatter that happens every time you load or unload weight.
Small hardware fixes like felt and rubber tape often eliminate the rattles that feel permanently unfixable but take five minutes and a few dollars to solve, according to REP Fitness’s home gym noise guide. Run a quick maintenance pass monthly: tighten loose bolts, make sure your rack is level (an unlevel rack rattles constantly, even at rest), and lubricate any pulley or cable system that’s started squeaking.
Technique changes cost nothing and often matter more than any product. Controlled eccentrics, lowering weight instead of dropping it, cut impact noise dramatically on deadlifts, overhead work, and box jumps alike. Use lifting straps on heavy pulls so you’re not tempted to release early because your grip gave out. And if you do Olympic lifts where a controlled drop is part of the movement, that’s exactly when a proper drop pad or platform earns its keep instead of trying to muscle through without one.
What Do Acoustic Panels Actually Fix?
Acoustic panels get recommended constantly for home gyms, and they do help, just not with the noise most people are actually worried about. Two different ratings describe two different jobs. NRC (Noise Reduction Coefficient) measures how much sound a material absorbs versus reflects back into the room, on a scale from 0 to 1. STC (Sound Transmission Class) measures how well a wall or barrier blocks sound from passing through it entirely. Panels are an NRC play. They reduce echo and make a room feel less harsh and boomy. They do essentially nothing for STC, which means they will not stop a dropped plate from being heard downstairs.
Acoustic wall panels absorb airborne sound and cut reverberation but don’t meaningfully reduce structure-borne impact noise from dropped weights, a distinction confirmed by REP Fitness’s gym acoustics guide. If your gym sounds echoey and harsh during a workout, that’s an airborne, in-room problem panels solve well. If the complaint is coming from the room next door or downstairs, that’s a floor and structure problem panels won’t touch.
For DIY panels, rigid mineral wool boards like Rockwool’s OC703-equivalent line, wrapped in fabric, are the standard budget-friendly build. Place them on the wall or ceiling surfaces within about 6 feet of your main noise source rather than covering every wall. Spot treatment near the equipment does more than blanket coverage spread thin.
- Mass-loaded vinyl (MLV) and constrained-layer damping compounds like Green Glue add real airborne blocking power when installed between drywall layers.
- These are genuinely effective but usually overkill for a typical home gym, better suited to a dedicated build-out where near-total isolation is the goal, per the Green Glue Company’s product guidance.
- Double drywall with a damping layer between sheets is the premium version of this fix and rarely necessary once your floor is properly treated.
Seal the Envelope Before You Spend on Anything Else
Small gaps around your gym door, outlets, and vents let airborne sound leak through walls that otherwise do their job fine. Sealing these is cheap and multiplies the value of every other fix you make, so do it before spending on panels or MLV.
- Door sweeps and adhesive door-seal kits close the gap under and around a door frame; installation takes about 15 minutes with a screwdriver and runs $15 to $30.
- Outlet gaskets and putty pads behind electrical boxes stop sound from passing straight through the thin metal box and drywall cutout, a surprisingly large leak point most people never think about.
- Recessed light fixtures are another common leak. If your gym ceiling has can lights, consider gasketed trim or a fixture cover rated for sound control.
- Window weatherstripping or a temporary window plug (rigid foam cut to fit, faced with fabric) handles the other major air gap in most rooms.
- Flexible HVAC duct connectors or lined ductwork reduce the amount of sound that travels through shared vent runs into other rooms.
Seal these gaps before investing in wall panels or MLV. A perfectly treated wall with an unsealed door under it will still leak most of its noise straight through that gap.
Reduce Continuous Noise from Treadmills and Cardio Machines
Treadmills are often the single loudest continuous noise source in a home gym, and the reason is twofold: footstrike impact travels into the floor with every step, and the motor itself generates a steady vibration that hums through the frame into whatever it’s sitting on. Unlike a barbell drop, which is a single event, a treadmill runs for 20 to 45 minutes straight, which is exactly why it generates more noise complaints than lifting does in many households.
- Anti-vibration pads sized specifically for treadmill footprints reduce both motor hum and footstrike transfer when the pad is dense enough and sized correctly for the machine’s weight and footprint, according to SOMA Fitness’s soundproofing guide.
- Position the treadmill against an exterior wall rather than a shared interior wall whenever your room layout allows it.
- Keep the belt lubricated and the machine level. A misaligned treadmill vibrates more and wears louder over time.
- Consider a walking pad or a rower as a genuinely quieter substitute during hours when noise is most likely to bother someone, since replacing treadmill sessions with rowing or cycling during sensitive hours meaningfully cuts complaints.
For readers weighing quieter cardio alternatives, Couchanddumbells has a guide to compact smart fitness devices built for space- and noise-conscious setups. If mobility or balance is a concern with any vibration-based cardio equipment, it’s worth reviewing who should avoid vibration plates before adding one to a shared-wall room.
Can Renters Soundproof a Home Gym Without Drilling?
Yes, and the floor-first approach happens to be the most renter-friendly fix available, since none of it requires permanent alteration.
- Loose-lay a floor stack (plywood plus a stall mat, or thick interlocking tiles) rather than gluing or nailing anything down. It lifts out completely when you move.
- Hang moving blankets using tension rods or removable adhesive hooks instead of screws, then take them down without a mark on the wall.
- Use a temporary window plug or a heavy curtain rather than permanent weatherstripping if your lease restricts window modifications.
- Choose bumper plates over iron and commit to no-drop technique. These behavior and equipment choices cost nothing structurally and matter enormously in a shared building.
- Swap a treadmill for a walking pad, which produces far less continuous floor vibration and is easy to store away entirely.
- Document your setup and talk to your landlord or downstairs neighbor early. A quick heads-up about your workout hours, paired with visible effort like mats and pads, prevents most complaints before they start.
For a fuller rundown of gear built for these constraints, see Couchanddumbells’ apartment home gym essentials guide.
What Should You Budget for a Soundproof Home Gym?
Your spending should follow the same floor-first order as everything else. Here’s roughly what each tier gets you.
An initial investment in mat, tape, and a door sweep captures the majority of the improvement most homeowners seek; everything past the recommended tier is chasing diminishing returns rather than fixing an unsolved problem, a pattern confirmed across garage gym soundproofing guides. Prioritize the floor and door seal first; panels and premium wall work are the most skippable items on this list unless echo or a very noise-sensitive neighbor is a specific complaint. For a shopping checklist that covers the gear itself alongside the acoustic layer, Couchanddumbells’ home gym equipment checklist is a useful companion to this budget breakdown.
Why Trust This Soundproofing Guidance?
This guide comes from Couchanddumbells’ editorial team, led by Belle, who covers home interiors and fitness gear with an eye toward what actually works in a real living space, not just a lab. The floor-first prioritization and cost tiers here are drawn from acoustic engineering guidance and practitioner-tested home gym guides, cross-checked against each other for consistency rather than taken from a single source.
The clearest signal across every credible acoustic guide is the same: impact noise is a structural problem, and structural problems get solved at the floor, not the wall.
For heavy Olympic lifting, shared walls with especially low noise tolerance, or a full basement build-out, a licensed acoustic engineer can design a floating subfloor or resilient channel system beyond what any DIY guide should attempt to cover.
Your Soundproofing Plan for the Next 30, 90, and 180 Days
Floor decoupling still does the heaviest lifting here: get mass and separation under your equipment first, and most of the complaint stops before you touch a wall.
- Days 1 to 7: Buy and install a mat or plywood-plus-mat floor stack, add rubber feet, and put in a door sweep.
- Days 8 to 30: Add dampening cubes, felt tape on hardware, and outlet gaskets; take a baseline decibel reading if you haven’t already.
- Days 30 to 90: Add a handful of DIY acoustic panels if echo is still an issue, and address cardio equipment with proper isolation pads.
- Days 90 to 180: Reassess. If noise is still a problem at a shared wall or floor, that’s your signal to consult a professional acoustic engineer rather than add more panels.
An Editor’s Take: Soundproof Your Home Gym With Floor-First Fixes That Work
The conventional wisdom on gym noise skews heavily toward foam panels because they’re visual, easy to sell, and satisfying to install. That’s backwards. Panels treat the symptom you can hear in the room; they do nothing for the thud your downstairs neighbor is actually complaining about. If Couchanddumbells’ research on this topic supports one strong opinion, it’s that homeowners consistently over-invest in wall treatment and under-invest in the $200 floor stack that would have solved the real problem in a weekend.
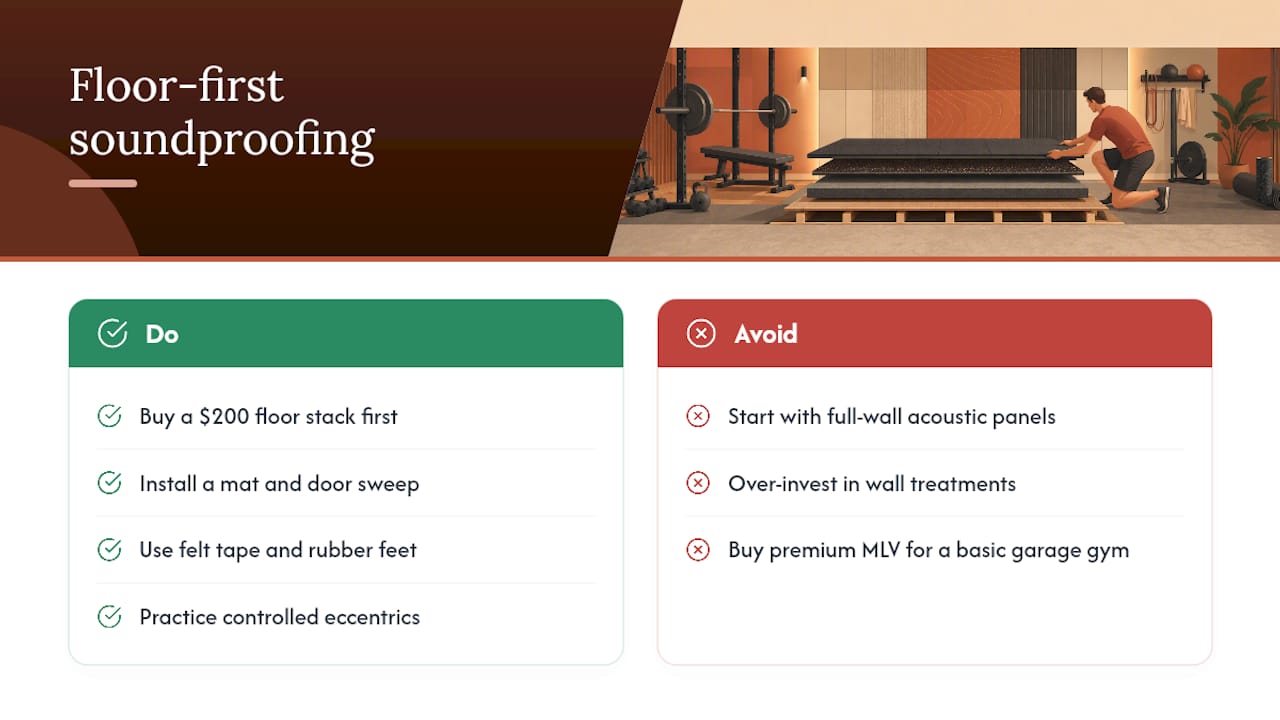
What’s overrated: full-wall acoustic paneling as a first move, and premium MLV builds for a garage gym that just needs a mat and a door sweep. What’s underrated: felt tape, rubber feet, and simply changing how you lower a barbell. None of that shows up in a shopping cart the way a panel kit does, which is probably why it gets skipped.
If you’re starting from zero, spend your first dollar on flooring and your first new habit on controlled eccentrics. Everything else on this list is optimization. Those two are the foundation, literally.
— Brian Dunn, Couch & Dumbbells
Sources
- How to Soundproof a Home Gym (Apartment-Safe Methods) | Home Gym Foundry
- Garage gym soundproofing guide: Reduce noise | GarageGymBuilders
- The Quiet Home Gym | REP Fitness
- Green Glue Company — damping compound and noiseproofing products
- How to Soundproof a Home Gym Without Major Renovations - SOMA Fitness
FAQ
What Is the Best Sound System for a Home Gym That Won’t Bother Neighbors?
Bluetooth headphones or a small personal speaker kept at moderate volume beat any built-in room speaker system, since airborne music noise adds directly on top of your equipment noise through the same walls and gaps you’re already trying to seal.
Do Acoustic Panels Actually Work in a Home Gym?
Yes, but only for airborne echo and reverberation inside the room; acoustic panels absorb sound rather than block it, so they won’t meaningfully reduce the impact noise from a dropped weight traveling through the floor.
What Are the Best Sound-Absorbing Panels for a Home Gym?
Rigid mineral wool boards like Rockwool’s OC703 line, wrapped in fabric and placed within about 6 feet of your main noise source, are the standard cost-effective DIY option for cutting echo.
What Are Good Noise-Reducing Mats for a Home Gym?
A dense rubber horse-stall mat at least 3/4 inch thick, layered over plywood on joisted floors or laid directly on a concrete slab, delivers the largest measured reduction in impact noise of any single product.
Is It Better to Fix Floors or Walls First?
Floors, without exception for impact noise. Structure-borne vibration from dropped weight or footstrike travels through the floor and framing far more efficiently than airborne sound leaks through a wall, so floor treatment addresses the source rather than the symptom.